Photography Processing: Lessons Learned
When I first started getting more seriously about this photography stuff, I focused mainly on getting a decent DSLR and learning how to use it to take better pictures. Pretty much common sense, right? I didn’t realize at the time how important the processing of those pics was to the final result.
At first, I was using the camera’s default settings, which meant every image came out as a jpg file. At the beginning of 2015, I switched that setting to RAW. Now, instead of the camera processing the image and compacting it into a jpg, I got the whole file with all the data and information the camera captured. Suddenly I could adjust white balance, tweak the exposure and shadows, and so much more. Compare the camera’s default jpg of Zoey from last year (left) to the one I processed from the RAW file (right).
That was just the start. In the past, I’d used Photoshop to do some basic fixes and adjustments to my photos, but I’d never really learned to take advantage of everything the software could do. (I’m told Lightroom is even better, but like everything else in this hobby, that would require spending more money.)
On the left is a picture of Sophie. I’ve already done the initial white balance and such in RAW, but haven’t done anything else. On the right is a picture where I’ve reduced the color noise, added a few contrast layers, added a saturation layer to brighten her nose, blurred the foreground a bit, and added a little sharpening.
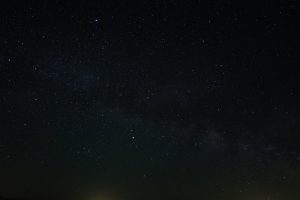
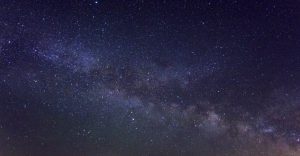
It’s particularly apparent when it comes to Milky Way photos. For a long time, I thought I just didn’t have a good enough lens and camera, or maybe I wasn’t getting the settings right. I could see the Milky Way in my pictures, but it was awfully faint. The shot on the left is an example of a jpg straight from the camera. But then I started researching how professionals process these pictures, and I realized a lot of the pics they start out with look faint and washed out too. But look what happens when you add several layers of contrast adjustment and a little bit of noise reduction.
I know the experienced photographers are probably rolling their eyes and saying, “It took you how long to figure this out?” But for me, this was an exciting revelation, one that’s added a lot to my photos … at least when I have the time to really work on them.






Eleanor
August 31, 2016 @ 5:52 pm
Ooo…that really does make a huge difference! I have the camera now, but still trying to figure out how to “fix in post”.
Lookong forward to seeing more. Are you on Flickr?
Jim C. Hines
August 31, 2016 @ 7:40 pm
I am, yes! At https://www.flickr.com/photos/41225422@N00/
I’ve also got some stuff posted on the Photography page here.
Eleanor
August 31, 2016 @ 10:16 pm
Sweet! You have some excellent shots there. 🙂 We have essentially the same camera too. As I said, looking forward to more.
Sally
September 1, 2016 @ 12:37 am
Before reading, I was thinking “Kitty nose looks cuter!” And lo.
D. Moonfire
September 2, 2016 @ 11:00 am
I’m trying to teach my wife how to use RAW mode on her camera, but it is difficult. I don’t really have the ability to teach it to her and it’s frustrating.
I love the galaxy picture.
Chuk
September 3, 2016 @ 11:40 pm
I’m right at about the same level and shooting raw really does make a difference in what you can do with the photos after. Now I just have to figure out what to do and in which situations…